knowledge-base
MySQL
安装
Windows 安装 MySQL
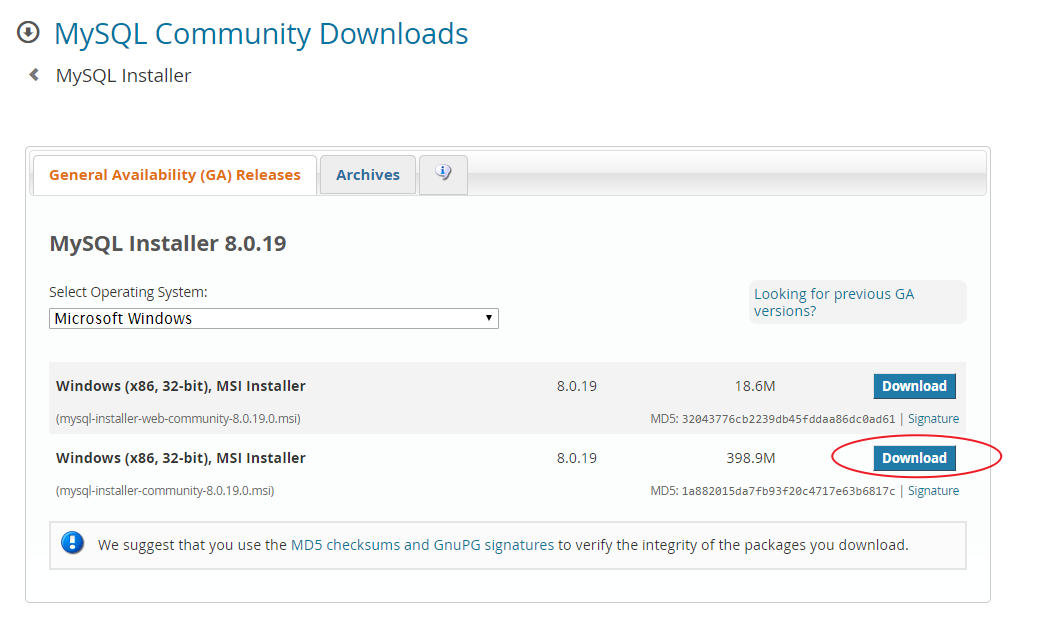
下载 Mysql 安装包:https://dev.mysql.com/downloads/installer/

下载完成后,双击 msi 文件安装。
Ubuntu 安装 MySQL
sudo apt update
sudo apt install mysql-server -y

# 只安装 mysql 客户端
sudo apt install mysql-client -y
Docker 安装 MySQL
docker run -d --name mysql -p 3306:3306 -e MYSQL_ROOT_PASSWORD=123456 mysql:5.7
Troubleshooting
Q1. root 用户本地登录
使用命令 mysql -u root -p,输入密码后登录失败,提示如下:
Access denied for user 'root'@'localhost'
解决方案::
-
修改 mysqld.cnf 配置文件
sudo vim /etc/mysql/mysql.conf.d/mysqld.cnf
在 [mysqld] 块的 skip-external-locking 下添加 skip-grant-tables
-
重启mysql服务
sudo systemctl restart mysql.service -
root 无密码登录 mysql
mysql -u root -p -
修改 root 用户密码以及 plugin
# 修改 root 用户密码 use mysql; update user set authentication_string=password("123456"),plugin='mysql_native_password' where user='root'; flush privileges; # quit 退出 quit -
注释 etc/mysql/mysql.conf.d/mysqld.cnf 刚新加的行
$ sudo vim /etc/mysql/mysql.conf.d/mysqld.cnf ... #skip-grant-tables ... -
再次重启 mysql 服务
sudo systemctl restart mysql.service -
使用root密码登录mysql
mysql -u root -p # Enter Password:123456
Q2. 创建用户
create user zhangsan identified by 'zhangsan';
grant all privileges on zhangsanDb.* to zhangsan@'%' identified by 'zhangsan';
flush privileges;
遇到 Your password does not satisfy the current policy requirements 问题。密码验证无法通过。
解决方案::
SHOW VARIABLES LIKE 'validate_password%';
set global validate_password_policy=LOW;
MySQL配置
创建用户
use mysql;
create user 'admin'@'%' identified by 'Admin@123';
%,表示允许所有访问地址远程访问,一般 root 账号是使用的’root’@’localhost’
grant all privileges on *.* to 'admin'@'%' identified by 'Admin@123' with grant option;
*.*,第一个 * 表示数据库资源,第二个表示表资源,也可以使用为 store_db.t_order
with grant option,表示允许级联授权
flush privileges;
# 查看用户
select user, host from user;
MySQL 开启 binary logging
- 修改配置文件,如果 MySQL 部署在 Ubuntu 上,修改
/etc/mysql/mysql.conf.d/mysqld.cnf文件,取消 server-id,log_bin 的配置项的注释;
sudo vim /etc/mysql/mysql.conf.d/mysqld.cnf
server-id               = 1
log_bin                 = /var/log/mysql/mysql-bin.log
- 重启 MySQL。
sudo service mysql restart
AWS MySQL 开启 binary logging
MySQL 执行进程
show processlist
# 结束执行进程,只删除 command 不为 Sleep 的即可
kill <id>
Mysql Join
Inner Join
select * from t_a inner join t_b on t_a.bid = t_b.id
Right Join
select * from t_a right join t_b on t_a.bid = t_b.id
Left Join
select * from t_a left join t_b on t_a.bid = t_b.id
MySQL常用
字符串
拼接字符串:
直接拼接字符串
select concat("hello, ","world!");
# 输出 hello, world
以某个分隔符拼接字符串
select concat_ws(';',"Apple","Orange","Banana");
# 输出 Apple;Orange;Banana
截取字符串:
某个字符串,从第 n 个,返回长度为 l 的字符串
select substring('hello, world!',2,4);
# 或者
select mid('hello, world!',2,4)
# 输出 ello
从左/右开始截图长度为 l 的字符串
select left('hello, world!',4)
# 输出 hell
select right('hello, world!',4)
# 输出 rld!
替换字符串:
某个字符串,从第 n 个,长度为 l 的字符串 str1 替换为 str2
select insert('hello, world!',2,4,'xxxx')
# 输出 hxxx, world!
替换特定字符串
select replace('hello, world!','ello','xxxx')
# 输出 hxxx, world!
查询字符串位置:
select locate('ello','hello, world!')
# 或者
select position('ello' IN 'hello, world!')
# 或者
select instr('hello, world!','ello')
# 均输出 2
时间
获取当前时间:
select now()
格式化时间:
select date_format(now(),'%y-%m-%d');
格式化参数
%S, %s 两位数字形式的秒( 00,01, …, 59) %I, %i 两位数字形式的分( 00,01, …, 59) %H 两位数字形式的小时,24 小时(00,01, …, 23) %h 两位数字形式的小时,12 小时(01,02, …, 12) %k 数字形式的小时,24 小时(0,1, …, 23) %l 数字形式的小时,12 小时(1, 2, …, 12) %T 24 小时的时间形式(hh:mm:ss) %r 12 小时的时间形式(hh:mm:ss AM 或hh:mm:ss PM) %p AM或PM %W 一周中每一天的名称(Sunday, Monday, …, Saturday) %a 一周中每一天名称的缩写(Sun, Mon, …, Sat) %d 两位数字表示月中的天数(00, 01,…, 31) %e 数字形式表示月中的天数(1, 2, …, 31) %D 英文后缀表示月中的天数(1st, 2nd, 3rd,…) %w 以数字形式表示周中的天数( 0 = Sunday, 1=Monday, …, 6=Saturday) %j 以三位数字表示年中的天数( 001, 002, …, 366) %U 周(0, 1, 52),其中Sunday 为周中的第一天 %u 周(0, 1, 52),其中Monday 为周中的第一天 %M 月名(January, February, …, December) %b 缩写的月名( January, February,…., December) %m 两位数字表示的月份(01, 02, …, 12) %c 数字表示的月份(1, 2, …., 12) %Y 四位数字表示的年份 %y 两位数字表示的年份 %% 直接值“%”
数据导入导出
A 表数据写入 B 表:
如果 a 表字段和 b 表字段一致,则直接使用以下语句
insert into t_b select * from t_a
如果只希望 A 表部分字段写入 B 表,则使用以下语句
insert into t_b (t_b.f1,t_b.f2,...) select t_a.f1, t_a.f2, ... from t_a
可以使用 as 使字段映射,可以使用 where 过滤数据